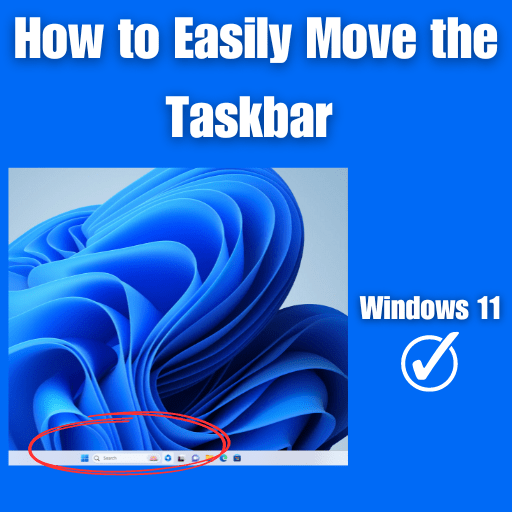
Windows 11 has brought numerous improvements to the desktop experience, including a redesigned taskbar that offers more customization options than ever before. One of the key features that users love is the ability to move the taskbar to different positions on the screen. In this article, we will explore the step-by-step process of moving the taskbar in Windows 11 to suit your personal preferences and workflow.
Table of Contents
How to Move the Taskbar
The taskbar is a central element of the Windows operating system, providing quick access to apps, the Start menu, system tray, and more. In Windows 11, Microsoft has introduced a sleek and modern taskbar with enhanced customization options. Among these options is the ability to move the taskbar to different positions on your screen, allowing you to optimize your desktop layout for convenience and productivity. In this detailed guide, we will walk you through the step-by-step process of moving the taskbar in Windows 11.
Step 1: Access the Taskbar Settings
To begin customizing the taskbar, you need to access the Taskbar Settings. Right-click on an empty area of the taskbar itself. A context menu will appear with various options, such as “Taskbar settings.” Alternatively, you can open the Settings app using the keyboard shortcut “Windows key + I.” Once in Settings, click on “Personalization” from the left-hand sidebar, and then choose “Taskbar” from the list of available options.
Step 2: Select Taskbar Alignment
In the Taskbar settings window, you will see several options to modify the taskbar’s appearance and behavior. To move the taskbar to a different position, look for the “Taskbar alignment” section. By default, it is set to “Bottom,” which places the taskbar at the bottom of the screen. However, you can choose from the following positions:
a. Bottom: The taskbar is located at the bottom of the screen (default position).
b. Top: The taskbar will be positioned at the top of the screen.
c. Left: The taskbar will be moved to the left side of the screen.
d. Right: The taskbar will be placed on the right side of the screen.
Read more
How do I install apps on Windows 10 without Microsoft Store?
Step 3: Choose Your Desired Taskbar Position
Click on the “Taskbar alignment” drop-down menu and select your desired position. As you make your selection, the taskbar will automatically move to the chosen location on your screen. Experiment with different positions to find the one that best suits your workflow and personal preferences.
Step 4: Customize Taskbar Icon Alignment
Windows 11 also offers the option to change the alignment of icons on the taskbar. This feature can be particularly useful if you prefer a more centered or compact layout for your icons. Under the Taskbar settings, look for the “Taskbar behaviors” section. Here, you will find a switch for “Center the taskbar icons.” Toggle it on to move the icons to the center, or leave it off for the standard left-aligned layout.
Step 5: Reorder Taskbar Icons
Personalizing the taskbar doesn’t stop at just moving it; you can also rearrange the order of icons on the taskbar to your liking. This allows you to organize your frequently used applications for quick access. To do this, simply click on an icon on the taskbar and drag it to a new position. Release the mouse button once the icon is where you want it to be.
Step 6: Auto-Hide the Taskbar
If you prefer a cleaner desktop or need more screen space, Windows 11 allows you to enable the auto-hide feature for the taskbar. With auto-hide enabled, the taskbar will only appear when you hover your mouse over its location. To activate this feature, go back to the Taskbar settings and look for the “Automatically hide the taskbar in desktop mode” or “Automatically hide the taskbar in tablet mode” option, depending on your device type. Toggle the switch on to enable auto-hide.
Step 7: Apply and Save Changes
Once you’ve customized the taskbar to your liking, click the “Apply” button at the bottom of the Taskbar settings window to save your changes. The taskbar will now be positioned and configured according to your preferences.
Step 8: Multi-Monitor Setup
If you have multiple monitors connected to your computer, Windows 11 allows you to independently customize the taskbar on each display. To do this, right-click on the taskbar of the monitor you want to customize, and follow the same steps as outlined in the previous sections. You can have different taskbar positions and settings on each monitor to suit your workflow on each screen.
Step 9: Taskbar Transparency and Colors
Windows 11’s taskbar offers a transparent look by default, blending seamlessly with your desktop background. If you prefer a more opaque taskbar, you can adjust its transparency level. Under the Taskbar settings, look for the “Transparency effects” option. Use the slider to increase or decrease transparency to your liking.
Additionally, you can customize the taskbar’s color to match your desktop theme. In the Taskbar settings, find the “Taskbar color” section. You can either choose a predefined color scheme or opt for “Custom color” to select a specific hue from the color picker.
Read more
How do I view DNS cache?
Step 10: Show or Hide System Icons
Windows 11 allows you to control which system icons appear on the taskbar. You can show or hide icons such as the clock, volume, network, battery, and more. In the Taskbar settings, scroll down to the “Notification area” section. Click on “Turn system icons on or off” to access the individual settings for each icon.
Step 11: Enable or Disable Task View
Task View is a feature in Windows 11 that allows you to see all your open windows and virtual desktops at a glance. It is represented by an icon next to the Start menu on the taskbar. If you find this feature useful, you can leave it enabled. However, if you don’t use Task View often, you can remove it from the taskbar.
To do this, right-click on an empty area of the taskbar and choose “Show Task View button” from the context menu. If the button has a checkmark next to it, it means Task View is enabled. Click on it to disable it and remove the button from the taskbar.
Step 12: Reset Taskbar to Default (Optional)
If you’ve made various changes to the taskbar and want to start fresh, Windows 11 provides an easy way to reset it to its default settings. In the Taskbar settings window, scroll to the bottom and click on the “Reset” button. Confirm your choice in the prompt that appears, and the taskbar will revert to its original position at the bottom of the screen.
Conclusion
The taskbar in Windows 11 is a versatile and customizable feature that allows you to optimize your desktop experience to suit your workflow and personal preferences. By following the comprehensive guide provided in this article, you can easily move the taskbar to different positions, adjust icon alignment, customize transparency and colors, and enable or disable various system icons and features. Experiment with these settings and make the most of the enhanced taskbar customization options offered in Windows 11 to create a personalized and efficient desktop environment.
This is the final part of this article. I have shared all queries about How to Easily Move the Taskbar in Windows 11. Hope you will understand all about it. If you have any queries regarding this please comment through the box.
Please click here to see the new post. Thank you!!!


